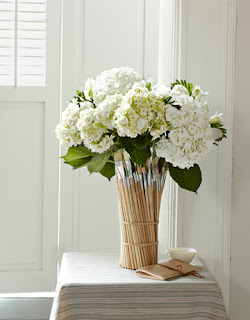
Burlap Bulletin Board

I decided to do a quick little project today, took me less than and hour.  I saw this photo a while ago, can't remember where.
I loved the look of the burlap bulletin board, so I decided to make a smaller version of my own.

I had an old picture frame from the thrift store that I had already spray painted white.
The picture in the frame was made out of a hard white board, so I used that as the "bulletin" piece.  You can probably find this board at any craft or home improvement store.

I cut out and hot glued a piece of burlap around the board.  Pulling it taught as I went.
Then put the board into the frame and stapled around the edges, through the board and into the wood on the back of the frame.
Very easy!

Once the baby comes, we are moving the office downstairs.  This new bulletin board will be a perfect addition when it's all set up.

Link Party
Today's Creative Blog

Spring Green

I chose to paint this dresser in a lovely, soft green.  It's almost turquoise, reminded me a lot of this petite dresser I did awhile ago.  Did I mention how happy I am that Spring is finally here...


 I loved the green color against the wood.  For the top, I lightly sanded it and left it as is.

With this dresser I tried out a different technique.  This time instead of sanding after I painted, I just used a damp rag to wipe some paint off the edges before it dried.
The paint color is a mix of two different "oops" paints.  One a dark green and the other a pale grey/blue.  I mixed enough together to achieve the look I wanted.


Link Parties
Between Naps on the Porch
Keeping it Simple
 DYI Showoff
Making the World Cuter
Primitive and Proper 
Miss Mustard Seed
Fingerprints on the Fridge
Finding Fabulous
Remodelaholic
Centsational Girl 
Jennifer Rizzo

B&A Friday

Today is the perfect day to paint.  Crisp, clear and dry.  It's about 80 degrees here in Atlanta and I couldn't be happier. Sunday is the first day of Spring, cold weather good riddance!!
I've been working on a couple new dressers, so hopefully I will have a reveal for you next week.  I've been moving pretty slowly, since I'm really starting to poke out now.  Finally had to delve into my maternity pants :(  And I have been feeling the baby move a lot the past few days. 

Now on to the B&A, this one was sent  to me by Margaret from

Her story...

My husband and I live in a rental and I gave our bedroom a major face lift this weekend by making an upholstered headboard out of cardboard poster board and burlap- the whole thing only cost me $10!
 Before
 After
 Can you believe that?  Such a cute headboard! 
Go on over and check out her blog to see the step by
 step on how it was done~
 

Paper Bag Floors?

Have you ever heard of such a thing?!  Well, neither had I until a reader commented on this post about painting the sub-floors in my kitchen.  I started doing a little research and came across several folks who have tried this interesting endeavor.


hmmm.. not quite sure about it, what do you think?

B&A Friday

This has been a pretty uneventful week, I have been searching high and low for great pieces but just can't seem to find any.  Hopefully the one I have my eye on from Craigslist will pan out.  We plan to go pick it up tonight.

Anyway, here is a great little chair re-do from Leah at

This is so lovely, Leah says she was inspired my Miss.Mustard Seed.  Aren't we all?

Click on over to little place called home sweet home to see her story and tutorial!

Have a great weekend everyone :)

Tip: Removing Contact Paper

I bought this great dresser at the thrift store a while back.
 
Once I started to work on it, I realized all the drawers had this sticky contact paper in them.
Even worse it was stuck on so good, that every time I tried to pull it off, it ripped into tiny pieces.  
I thought maybe if I put really hot water on it, it may be easier to pull off.  After all it worked for my wallpaper problem.  But that turned out to be a big ole' mess, so then I had the brilliant idea to try out a hairdryer.  And the paper peeled off like a dream.
Some of you may have already discovered this little trick, but if not it may save you a lot of frustration on your next project ;)

Painting a Sub-Floor?

I've seen several people out there in blog land, who rip up old carpet or tile and paint the sub-floor underneath and use it as regular flooring.  My experience with sub-flooring is that it's paint splattered and very rough.  So I really wonder how one prepares such a floor to use on an every day basis.  Seems like a lot sanding would be involved, but totally worth it.  What an inexpensive way to brighten up a room.
How do you like this one from
 I absolutely fell in love with this one from Ashley at

And Laurie from Little Blue Chairs painted the floors in her dining room

We have a the typical 80's linoleum still residing in our kitchen and I desperately want to get rid of it.  But, of course it is not in our budget anytime in the near future.  So maybe this might be a temporary solution.
What do you think??? 
Any comments or opinions on this matter would be greatly appreciated :)

DIY Ideas

Lately I've been finding some neat and simple ideas in my recent magazines, so I thought I'd share them. 

 This is a really cute, and it's recycling.  I always see old colanders at thrift stores so I think I may try this one.
It's drainage holes provide excellent drainage that a healthy root system needs.
image from Crafterholic


This next one comes from my Country Living mag
It is an idea from Camilla Fabbri at cfabbridesigns.com/blog  
See how to make it here


Or how about this yard stick coat rack, looks easy enough.  It's an idea from my DIY mag.
click here for the step by step
If you try any of these, I'd love to see how they turn out~