Crib Bumper

 I finally finished the crib bumper for K's baby.  I think it turned out pretty good for my first real attempt at sewing.  
Here is the final product

This was a great gift for her.  She was unable to find a pre-made bumper she liked, so I offered to make one out of a fabric she chose.  I bought a pattern and just followed the directions.  It was a little difficult, since I don't know all the sewing lingo.  But overall, pretty easy.  If you don't mind sewing, I highly recommend doing this for anyone you know who is about to have a baby and is in the same predicament.
It looks so cute next to the green walls, that K perfectly matched to the green in the fabric.
 So excited to meet this little guy who will sleep with this bumper I made just for him!

*Don't forget to enter the Give Away for the chalk board*

1st Give Away!

What a wonderful holiday weekend, we ventured up to SC for the holiday and spent it visiting with my mother in law's very large family.  They have a tradition each year to roast a pig, and everyone brings a dish.  It was very gratifying to be around a group of such genuinely sweet people. I hope you all had a great Thanksgiving as well, now on to the give away.
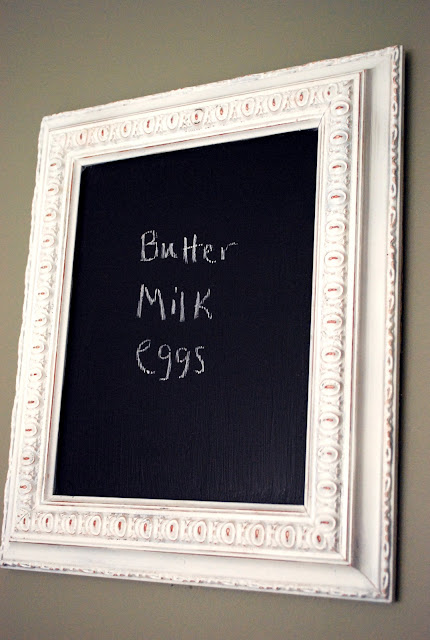
I really wanted to make something for the winner, so I decided to go with a cute chalk board.
This would be perfect for your home. It could be used for to-do lists, jot down a number or give someone a message.  I 'm just so thankful for all of your support and kindness over these past few months, I really wanted something I made to go in one of your homes.


White frame size 13 1/2 X 11 1/2

Here are the rules~ If you want to win.
1). Please become a follower/subscriber first.
2). Leave me a comment telling me your name and one thing about yourself.
3). If you don't have a blog or a Google account, leave a comment and send me a message with your e-mail.
4). Also make sure you read this, I don't want a winner I can't get in touch with!

*Give away ends Thursday I will announce the winner Friday*

Thank you Give Away

 I wanted to thank you all for being such a constant support in this new endeavor I have taken on.  I had never thought of blogging in my life, or refinishing furniture for that matter.  
But today I reached 200 followers and I couldn't be happier.  I have loved getting to know some of you, albeit through e-mail, but nevertheless I feel like I know a part of who some of you are.  I read all of your comments and try my best to reply.  But I wanted you to know why I sometimes don't.


Chris said it best over at Just a Girl ~

"Can I make a suggestion/plea/beg for mercy/down-on-my-knees proposition?
In an effort to save time, I check all my comments via my e-mail. Unfortunately, many comments leave me with that “no reply blogger blah, blah, blah” stuff.  UGH!  I can’t get back with you that way!  Here’s what you can do!

1.  Go to your blog and click on “customize”
2.  Click on “dashboard” in the upper right hand corner.
3.  Next to your profile picture, click on “Edit profile”
4.  Under privacy, click “show my e-mail”  Under identity, make sure the public e-mail address you use is there.
5.  Save
Now I can reply to your comments much easier and much more efficiently!  Thanks!"


In other news, I thought I'd thank you by doing my first ever GIVE AWAY!
I'm not sure yet what I will be giving away, but I will think of it over the next few days and get back with you on Monday!!
I'm taking the holiday off, so I hope you all have a Happy Thanksgiving :)

Love ya mean it~
Kathleen 


Burlap Vase How to

I saw this great idea from Cassie over at  Hi Sugarplum!  She copied a $50 burlap wrapped vase from Ballard. When I saw her post I immediately wanted to give it a try on my own.  However, I did it a little differently.
I got the vase from the dollar store and another small one.  
 First, I Cut out each piece of burlap to fit perfectly around my vase. Then I used a lighter to gently burn off the tiny "hairs" on the edges.

 Where Cassie used glue, I tried Mod Podge.  I slathered on a thick layer of the stuff all over the burlap piece, then carefully wrapped it around the vase.  The Mod Podge made it a bit stiffer and more fitted to the vase.
 Then I allowed to dry for about 30 min.
And......
First the Ballard version
And mine!
The burlap adds great texture to any decor.

http://madincrafts.blogspot.com/2010/11/mad-skills-30.html

Cabinet Re-Do

Yet another turquoise piece.  Have I mentioned how much I love this color?  I mixed up my own paint color  again, so I'm sorry to say I won't be able to give you specifics.  It was three different colors of oops paint and one of them doesn't even have a name.  But it was a dark green, a pale gray and a rich blue gray.  I mixed and mixed until I got this fantastic rich turquoise color.  It took me a couple tries, but I finally got it right!  As of right now I will be keeping this piece, but things change.

Remember this little guy?
Although he was in pretty good shape, just needed to be updated into the 2010's.
 Now he greets me as I walk up my stairs.
Since I plan on keeping this one, I heavily distressed it.  I don't usually because I'm not sure many people like that look.  But I do!
I stripped and stained the top dark, primed the bottom with oil based primer.  I tinted my primer with green because I knew I wanted to to show through later, and I didn't want it to be bright white.  Then I painted it with the turquoise.  I used my sander to heavily distress it and then went over it all with a dark walnut stain.

Me likey :)
(These pictures don't do it justice, my hallway is dark and I had to rely on a overhead light )

Link parties
http://www.storiesofahouse.com/2010/11/project-diaries-volume-9.html
http://betweennapsontheporch.blogspot.com/2010/11/pottery-barn-ornament-pine-garland-hack.html

B&A Friday

Time for another before and after pic.  This one sent from Shannon over at AKA Design.  She did a fantastic job making over this thrift store lamp. 

In doing our living room revamp, we noticed that at night our lighting was really off-balance. During the day the whole room was well lit because one entire 28 foot long wall (the living and dining areas) is floor to ceiling windows. But at night, when the curtains get closed there needs to be something over on the window side of the room.
So off to the thrift stores I went (with my three little munchkins in tow, I might add). There were a couple of lamps at the Salvation Army that looked okay…but they were still $9.99 each. Not cheap enough for me. What? I was looking for C-H-E-A-P.
Off to the Goodwill Superstore. Hmm, what’s this? 50% off everything. EVERYTHING!
Oh look. A nice tall curvy lamp. Regular price $4.99 x 50% off = $2.50! BINGO


It just goes to show what you can do with a lamp from the thrift store.  You'd be surprised at what you can find!
Go on over and check out how she did it.
 
Hope you all have a great weekend!!
PS.
Send me YOUR before/after pics to be featured on B&A Friday
betweenblueandyellow@yahoo.com


Sewing

I'm not usually the one who makes my own clothes or sews pillows.  But for one of my best friends, I've decided to make a bumper for her baby's crib.  I've been working on it off and on for the past few weeks and I'm almost finished. I just wanted to show you the cute fabric and the progress I've made so far.
My friend was unable to find any bedding that she wanted, so I asked her if she wanted to pick out some fabric and I would handle the rest. I bought a cheapo pattern for $1 at the fabric store, not really remembering anything from my sewing class in high school, I had to wing it.  It all started coming back to me, kinda like riding a bike.  But I'm happy with the way it's turning out.  I will be posting when I'm all finished and the crib is all put together.
I had my sister Jamie make the crib skirt, because I thought that might be a bit harder, and she is a pro.  Check out what she does here.  She makes custom bags and aprons.  But if you have a special request she'd be happy to hear from you.
Stay tuned for the crib reveal!
Love ya mean it~

Pinky

Over the weekend, I finally finished a new piece.  Between getting my wallet stolen, mice/rats in our attic, my birthday this past week, it has been hectic.  Yes, that's right I had a birthday.  It was lovely, mom took me shopping, I received flowers from my love, and friends and family came 'round to celebrate. 

So on to the desk...
I bought this sweet, little desk at an estate sale several weeks ago.  It sat waiting patiently in my carport, until I finally got a vision.  I pictured it soft, sweet and pink.  Perfect for a little girl's room.
Before 

 After


I used my own mix of white and red, to get a soft, delicate pink.
I'm sorry I can't always tell you the name of a paint color, it's just cheaper to buy "oops" paints and mix them myself.
Isn't it so cute?  I really hope someone buys this for their little girl.  The whole time I was painting it, I pictured her sitting there doing homework.

I also really love the original hardware.  I have never seen any like them, with the lattice work in the middle.
I cleaned them up and sprayed them with my go to can of-oil rubbed bronze.


(Just realized I need to fill that little hole, bottom left...)

Link Parties
http://thediyshowoff.blogspot.com/2010/11/vintage-window-mirror-and-diy-project.html
http://betweennapsontheporch.blogspot.com/2010/11/create-your-own-ice-bucket-or-ice.html

B&A Friday

This week, I'm featuring a little something different. Ideas come from all over and I thought this cute trash can make over is a great idea!  It comes from Deborah Lynn over at Green Willow Pond

I had these two ugly trash cans in my kitchen. There is no where to hide them at present, and they were really bugging me. Our cat had scratched them up trying to tip them over. (When the mice are away...)
I priced new black trash cans. They were around $14 each at Walmart. Not bad...but I really want to save my pennies for quality stainless steel ones. So, at $4 plus for a can of Krylon Fusion plastic paint (it took one per trash can), I decided to try painting them.
Before
 After

Number 1 is for paper (we burn our paper), and Number 2 is for anything else that can't be recycled or composted.  They aren't perfect.  If you get close you can still see some scratches, but anyone who puts their nose close enough to see that...well I'd have to wonder about them!

Cute huh?  
I like the simplicity of it.

Send in your before/after pics!
betweenblueandyellow@yahoo.com

Off the Subject

This has nothing to do with furniture or decorating.  I just thought I should share it will you all.  If any of you are as sick as I am at paying $60-100 for a haircut then listen up!  My past two hair cuts have been from students.  I was a little weary at first, thinking "Oh no! They might make me look like the bride of Frankenstein!"  But honestly there's very little you could do to mess up my hair.  It is straight and thick, and your basic haircut is great for me.  I may not recommend this if you have difficult hair, and no one can give you a good cut but the lady you've been going to for 20 years.
But these students, are really great!  I saw many of them doing color, I may not risk that, a haircut is more simple.  My haircut today was only $15!!! Can't beat that with a stick!  I doubt I'll ever go to a real salon again.  Plus in Atlanta there is an Aveda Institute, which I love.  Aveda products are my fav!  I went to a Paul Mitchell one before, but I like the Aveda one better.
See if there's one in your area, Aveda
Or just Google, hair schools in your city.
 My hair cut today, got about 3 inches off.
My hair really isn't that blond, just they way the light is hitting it :)
There is furniture coming I promise!


Clam Spaghetti (easy)

This recipe comes from my grandmother, one of the best cooks in the world.  She had seven children and always had a hot meal waiting on the table.  Whenever I visit, delicious left overs from the night before, are served for lunch.  She knows how to cook good food for a large family and always had time to do the dishes, mow the lawn, talk to the neighbors, do the laundry etc.  I could never imagine having seven children, but she did it all with patience and finesse. 

Clam spaghetti is a favorite amongst her grandchildren, we get very excited when we hear she's making it for dinner.
Ingredients
1 large can + 1 smaller can whole tomatoes
2 cans white clam sauce w/whole clams
3 cloves garlic chopped
2 tbsp olive oil
1 box spaghetti noodles

In a large pot, saute garlic in olive oil for several minutes.  Do not allow them to brown.  Strain the clams from the juice and pour the juice into the garlic and oil, set clams aside.  Next, your going to take the whole tomatoes and while holding your hand over the pot, squeeze the tomatoes into the pot.  Squeeze them all and pour in the juice. (I know this sounds weird, but it works)  Allow this to simmer on LOW for at least an hour, stirring occasionally.  If you've got the time it's really great if it can simmer for several hours.  Meanwhile cook spaghetti according to package directions
Five minutes before serving, pour in the clams.  The tend to get tough, if you let them cook too long.

Caution:Your house will smell sooooo good while this is cooking :)
*Note this recipe has been a little bit tweaked by me.

B&A Friday

This week, I wanted to share an amazing make over from Kate over at Centsational Girl.  She worked very hard on this project and deserves a round of applause. 

Oooooooh happy Friday friends.  Guess what?  I finally finished our staircase!  Let me tell you, with two little monkeys running around, I was forced to take this on late at night after they had gone to bed.  So for the last ten days, yours truly has been up late sanding, staining, priming and painting, plus polyurethaning (is that a word?) in order to get our staircase to look like this.
Hello gorgeous!
 
Gorgeous!  She did such a great job, head on over to her blog for a step by step tutorial of to how she did it!

Quick Little Tip

As I was moving my most recent piece to its new location for the time being, I did something I've done for years now.  I thought you all might benefit from this little tip, unless you already know about it. 
When moving something buy myself, and on a hard floor, not sure this works as well on carpet.  I put pot holders under the feet and slide it across the floor, like so...
As long as the piece is not too heavy this should work.  Slowly lift one leg at a time and shimmy a pot hold under each leg.  Gently slide the piece across the floor, and voila!  Instant furniture movers!

French Onion Soup

This is a very simple recipe for a really delicious soup.  I've made this several times, and it is one of my husbands favorite dinners.

Ingredients

  • 2 onions, thinly sliced
  • 1/4 cup butter
  • 2 tablespoons all-purpose flour
  • 2 (10.5 ounce) cans beef broth
  • 2 1/2 cups water
  • 6 slices French bread, toasted
  • 1/2 cup grated Parmesan cheese
  • 1/2 cup shredded Swiss cheese

Directions

  1. Preheat oven to 425 degrees F(220 degrees C). Separate sliced onion into single rings.
  2. In a medium sauce pan saute onions in butter until soft, approximately 20 minutes. Stir in flour and gradually add broth and water. Bring to a boil and simmer for 20 minutes.
  3. Meanwhile, toast French bread slices.
  4. Place toasted bread into soup bowls. Pour soup mixture over bread and sprinkle with Parmesan and Swiss cheese. Bake for 10 minutes.  

So Pretty

It took me awhile to figure out what to do with this magnificent piece.  It is one of the prettiest dressers I've worked on.  First, I thought I might try to refinished it and do a dark stain.  But that didn't turn out too well.  The wood was not as nice as I initially thought.  I believe it had been in a basement for awhile, because the wood was kind of soft.  It wasn't sanding well. I did the wood conditioner and the stain, but it didn't look the way I wanted.  So, on to plan B.  I decided not to go bold with a color this time, but to keep it soft and elegant.  This piece was so sweet and dainty, I wanted the color to go with it.  A bright red, or blue was not going to cut it.
Before~
Lots of dents and scratches.


 After
 Once again I won't be able to say what color this is,  I did a custom mix of several different paints.  It's kind of a soft blue/ gray.
 Isn't she lovely?  I still need to find matching pulls for the top, but I couldn't wait to share it with you all!

** Remember, please send me your before/after shots, 
for my B&A Friday!**

Link Parties
Visit thecsiproject.com