My Front Door

I'm getting a little trigger happy with my paintbrush.  It seems I want to paint everything in sight.  It’s just so amazing what a little paint can do to freshen up, in this case my front door.
There are lots of painted front doors for the out side but I rarely see a painted door on the inside.  After painting our basement door, I got inspired to do another.
Here, the door before with some paint already applied.
blog 001
And after
blog 003I also used a little stain on the trim so it would stand out a little more.
blog 002
What d’ya think?
This was my inspiration photo
        I loved this turquoise color, but I just used what I had on had and mixed up a paler version
730184409_tT4tS-O
Link Parties

How To: Stain a Dresser Top

Here is a step by step tutorial of how I stain my dresser tops.  If you don’t know how to do this,  this post is for you.
                                               This dresser had one of the worst tops that I had ever worked with
                                                            It was covered with water rings and scratches.furniture 380
Step 1:  Some may not choose to do this, but I find it makes the sanding part a little easier.  I choose to strip off the old varnish first.  I use Citristrip I get from Lowes.  It’s a better alternative to those stinky strippers of yester year.  And it works great.  Follow the directions on the bottle and get a good tool for scraping off the stuff.  It gets pretty messy so wear some gloves.
After you scrape it all off and it’s dry move on to the next step.
Step 2: (You must have a sander for this part)  Sand the heck out of it with some 60 or 80 grit paper.  I recently got an orbital sander and it works great.  It will take a bit of elbow grease, but it will be worth it in the end.  I also highly suggest you get a nice breathing mask, it’s probably not a good idea to be breathing in that dust. After this sanding part, go over it again with a 120 grit to get the top smooth.
Step 3: Make sure you clean the top of all dust.  I just use a wet rag and wipe it down several times.  Allow it to dry completely.  Then if you want a more even distribution of the stain, I recommend using a wood conditioner.  I use Minwax Pre-Stain Wood Conditioner.  Follow directions on can.
Step 4: Get the stain you want to use, I use Dark Walnut by Minwax.  Use a good quality brush and begin to paint it on with the wood grain.  Allow it to sit for as long as you want.  The longer you let it sit the darker it will be.  However try not to let it completely dry.  You will want to wipe off some after 15 min or so.  If it’s not dark enough for you, do this process again.
Step 5:  Once you achieve your desired color, allow it to dry.  You can also brush some polyurthane on top as a protective coat and to make it shiny. Clean your brush right away, because the stain is a b*%$@ to get off when it dries.
So there you have it.  My basic 5 steps for achieving a beautiful dark stained top like the ones you see here.
 Copy of furniture 375 furniture 005 furniture 170
furniture 295 furniture 339 furniture 344

Green Dresser #2

                                                              ***SOLD**


Okay, so I'm sure you've guessed by now that I love the color green.  Proven here, here, and most recently here.
With this dresser I decided to make it look similar to green dresser #1 because it has been the most popular piece of furniture so far.
This was one U-G-L-Y you ain't got no alibi piece before
furniture 379.  furniture 380
After, with dark stained top
   furniture 374
The color is Pine needle by Eddie Bauer

furniture 376
This piece would be perfect as a buffet or a TV console
 furniture 375 
The cabinets open up to reveal two more drawers. 
The drawers could be removed to make room for DVD player, or video game systemfurniture 377

Link Parties

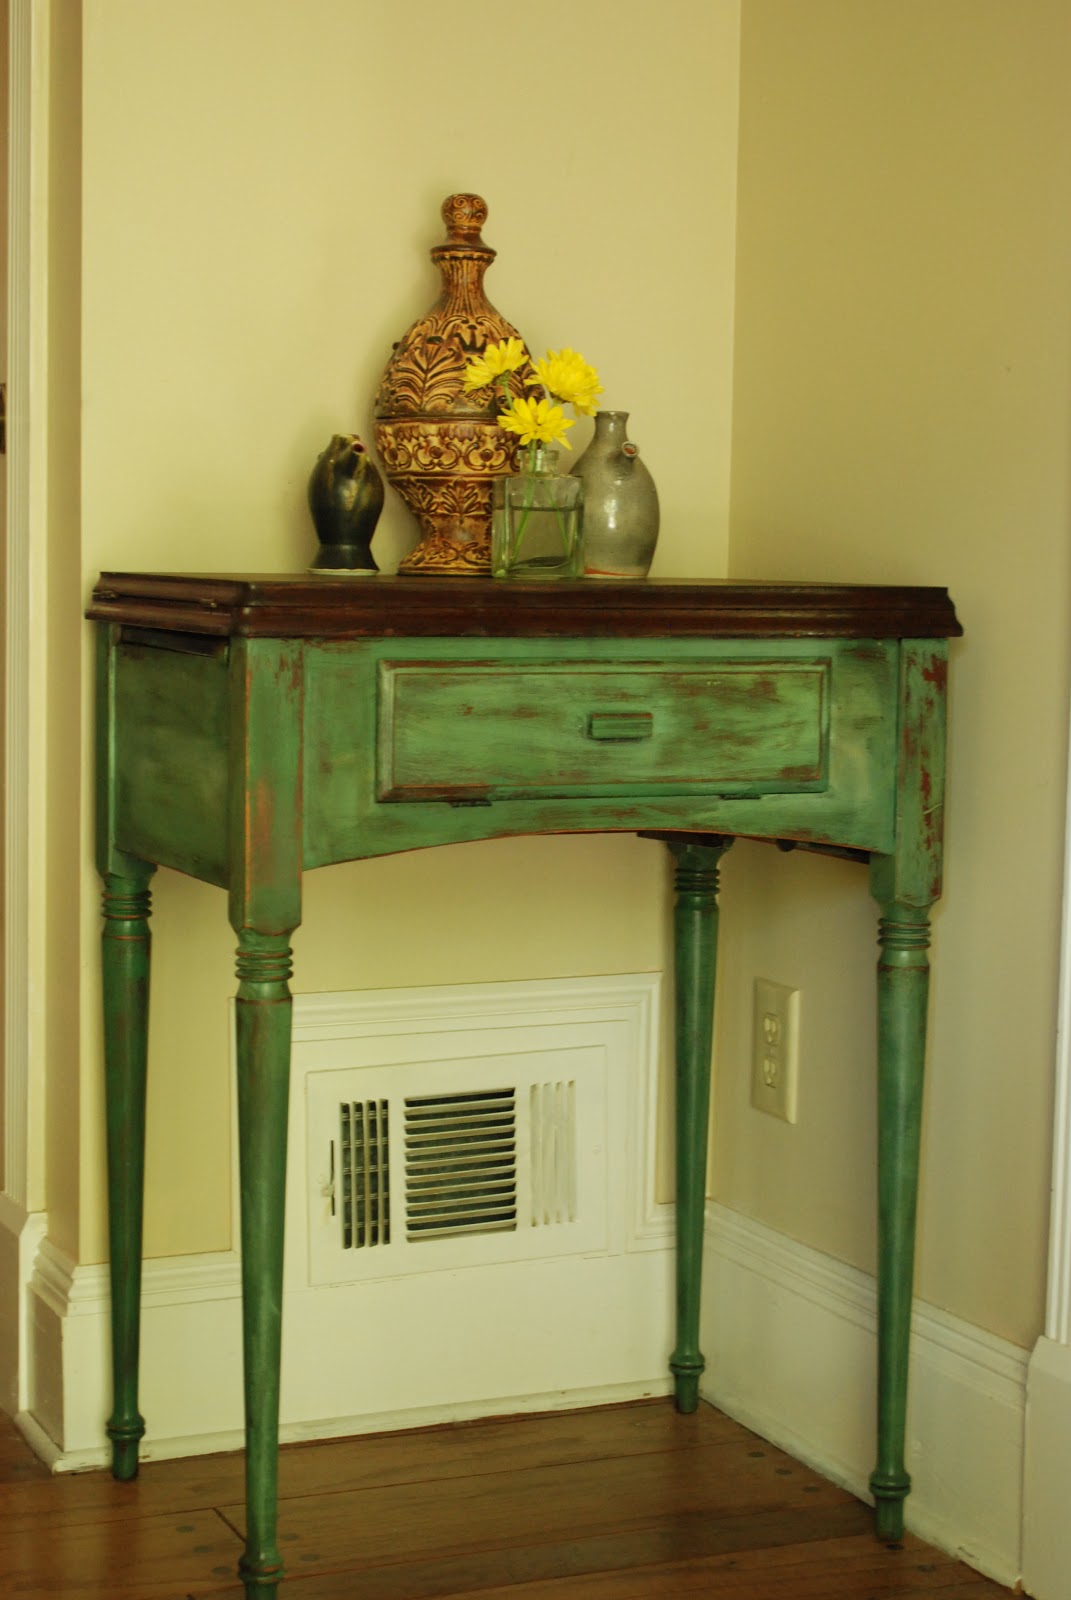
Another Sewing Table

Finally, after 4 weeks after having a baby, I was able to start on a new piece!
I had pinned this photo from Design Sponge a while back
I fell in love with the distressed green, and was determined to recreate it.
I like to use what I have on hand, so the green doesn't match up exactly.  But I love the way it turned out.

So allow me to introduce Mr. green
furniture 001

furniture 006
Here it sits in my foyer.

And I also just picked up a dresser last night, that I can't wait to get started on!


Pinterest Challenge

Our little girl

Just wanted to let you all know that we welcomed the newest member of our family on 8/28.


I look forward to getting back to work on the furniture soon.
But it may be hard to stay away from this face for too long :)

From Office to Nursery

Two days before our baby girl is due, we finally finished her room.  We were on a limited budget so most everything is re-used from her big sister or from other parts of the house.  However, I did sew some new bedding for the crib, which only cost about $15.

Here is the room when we first moved in.


 Instead of painting the shelf for this table, I decided to cover it in the same fabric as the bedding.
I just used some Mod Podge, cut the fabric to size and pressed it on.

            
Yesterday a rude man yelled out to me at the gas station and said
"Looks like you're ready to pop!"
Nice.


Roomspiration


Painted Door

We are still working on getting our basement fixed up.  It has been a long process, mainly because it's not really a priority.  One of the problems is the fact that I can't see it most of the time.  I only go down there to get something maybe once or twice a month.  So it's been neglected to say the least.  But over the weekend I started sprucing it up a bit and finally painted the door going out side.

  Much. Better.
The next step will be painting the floors.  That will have to wait .
But this is a major improvement. 
This is a mix of white, blue and green paint I had in my paint collection.

Sweet Side Table

I finally got around to painting this cute handmade side table for our new baby girl's room.  It has been sitting in our kitchen collecting dust, for close to a year now.  But with some free time and a burst of energy I hauled it out side and got to work.
Usually, I'm not a fan of pink.  But for some reason, I've felt this piece should be a soft, delicate pink to go with the crib bedding.
Before


Crib

It's amazing how ready one can get for the first baby.  Then when the second one comes along your scrambling to get the room in order when you arrive home from the hospital.  Thankfully though I've got the bed all set.  Still working on some pictures for the walls, but hey, I've still got 3 weeks right?
My wonderful cousin, who has been ever so helpful in giving hand me downs from her girls, gave me her old crib set.  It wasn't really going with the wall color, so I re-covered it in new fabric.
Sorry, no before shot....
 I used the pattern from the old covering and cut out each piece.  This was a very easy project, if you can sew a straight line you can do this too.  Check out my tutorial from the other crib bumper I made. 
Full room reveal still to come!

New Piece For Sale

**SOLD**

Maybe it's the whole "Nesting" thing, but I've been on a role with furniture lately.  I don't know how I find the energy, but I'm thankful it's there!
We also could really use the money, so maybe that's where my motivation is coming from.
I got this lovely antique dresser on Craigslist.  I paid a little more than I usually do, but it had so much potential.
I used a can of paint my sister so generously donated to me, it's a cool green/gray.

Here is the before (Craigslist photo)


I just want to whistle at these legs, they are so lovely.

 Please send me an email if you are interested in this dresser
betweenblueandyellow@yahoo.com

Link Parties